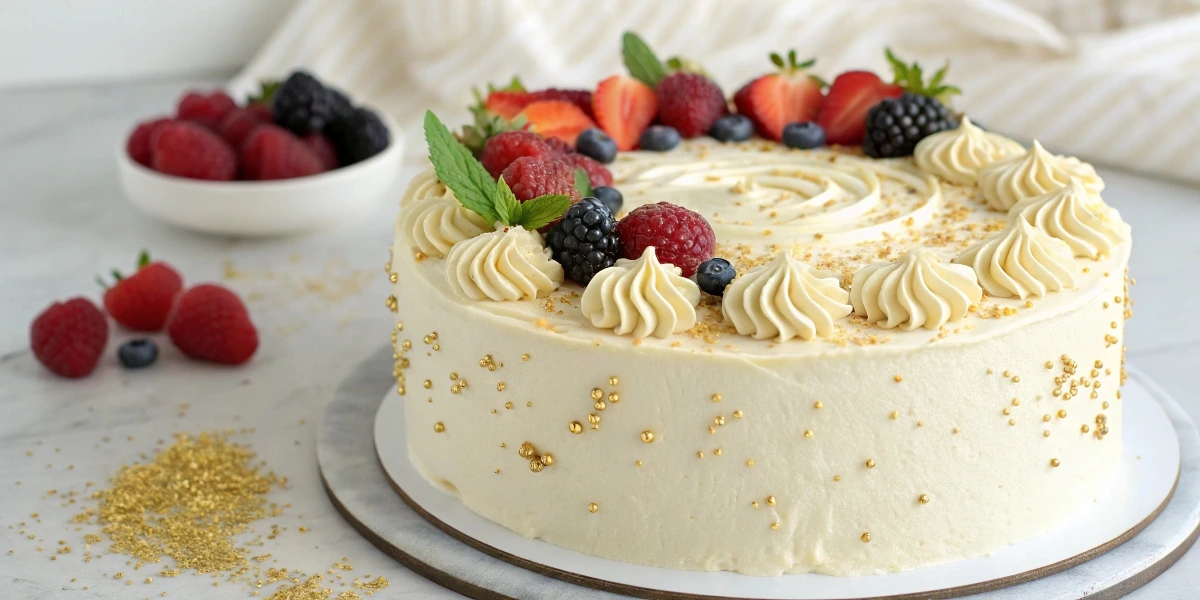
Have you ever dreamed of a light, fluffy, and delicious birthday cake that’s completely dairy-free?
If you think making a dairy-free vanilla birthday cake means giving up flavor, softness, or that classic birthday cake taste, think again! Whether you’re lactose-intolerant, following a dairy-free diet, or simply looking for a healthier dessert, this recipe will surprise you. It’s easy to make, super moist, and tastes just like a traditional vanilla cake—without any dairy!
Let’s dive into this irresistible recipe and learn how to bake a show-stopping birthday cake that everyone will love.
Table of Contents
Why This Dairy-Free Vanilla Birthday Cake is Special?
Time Required:
- Preparation Time: 15 minutes
- Baking Time: 30–35 minutes
- Total Time: 50 minutes
Difficulty Level:
Beginner-friendly! Perfect for first-time bakers or anyone looking for a quick and simple homemade cake.
What Makes This Recipe Unique?
- Completely dairy-free – No milk, butter, or cream needed!
- Soft and fluffy texture – Just like a classic birthday cake!
- Rich vanilla flavor – Thanks to pure vanilla extract.
- Customizable – You can easily adapt it for different diets and preferences.
Essential Ingredients for Dairy-Free Vanilla Birthday Cake
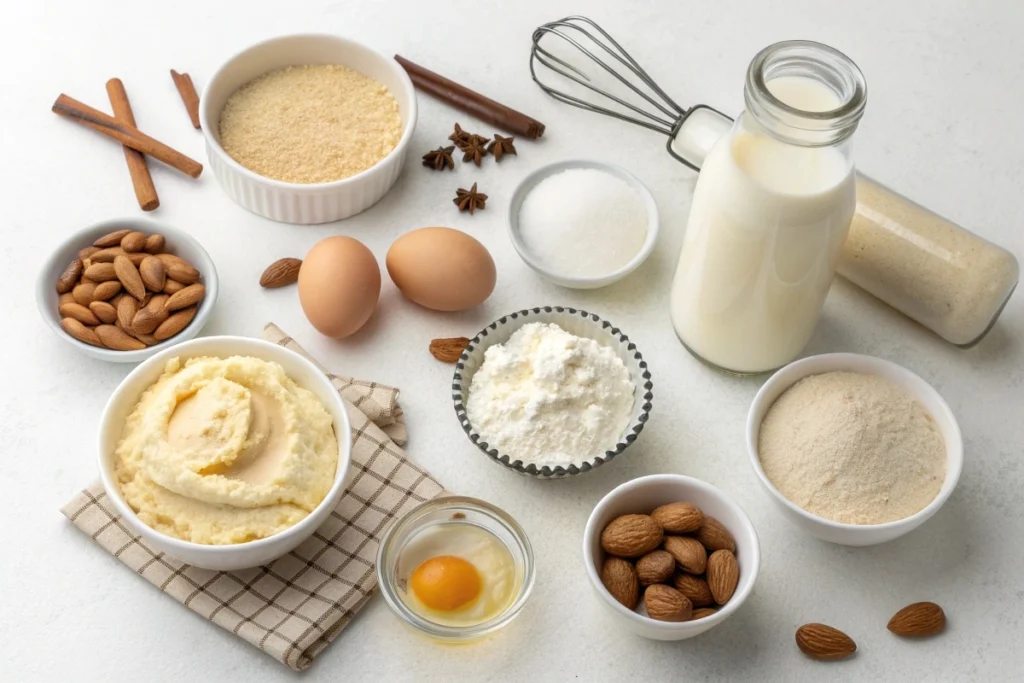
Every ingredient in this recipe plays a special role in creating the perfect birthday cake! Here’s what you’ll need:
Main Ingredients & Their Importance
| Ingredient | Why It’s Important | Dairy-Free Substitutes |
|---|---|---|
| Flour (2 ½ cups) | Gives structure to the cake | Gluten-free flour (for GF option) |
| Sugar (1 ½ cups) | Sweetens the cake | Coconut sugar or maple syrup |
| Baking Powder (2 ½ tsp) | Helps the cake rise | Baking soda + vinegar (if needed) |
| Salt (½ tsp) | Enhances flavor | Sea salt |
| Eggs (2 large) | Adds moisture and structure | Flax eggs (for vegan option) |
| Vanilla Extract (2 tbsp) | Key to that classic vanilla flavor! | No substitute needed |
| Dairy-Free Milk (1 cup) | Adds moisture | Almond, oat, soy, or coconut milk |
| Oil (½ cup) | Makes the cake soft and tender | Coconut oil, vegetable oil, or melted dairy-free butter |
| Apple Cider Vinegar (1 tbsp) | Reacts with baking powder for extra fluffiness | White vinegar or lemon juice |
Step-by-Step Instructions for Making Your Dairy-Free Vanilla Birthday Cake
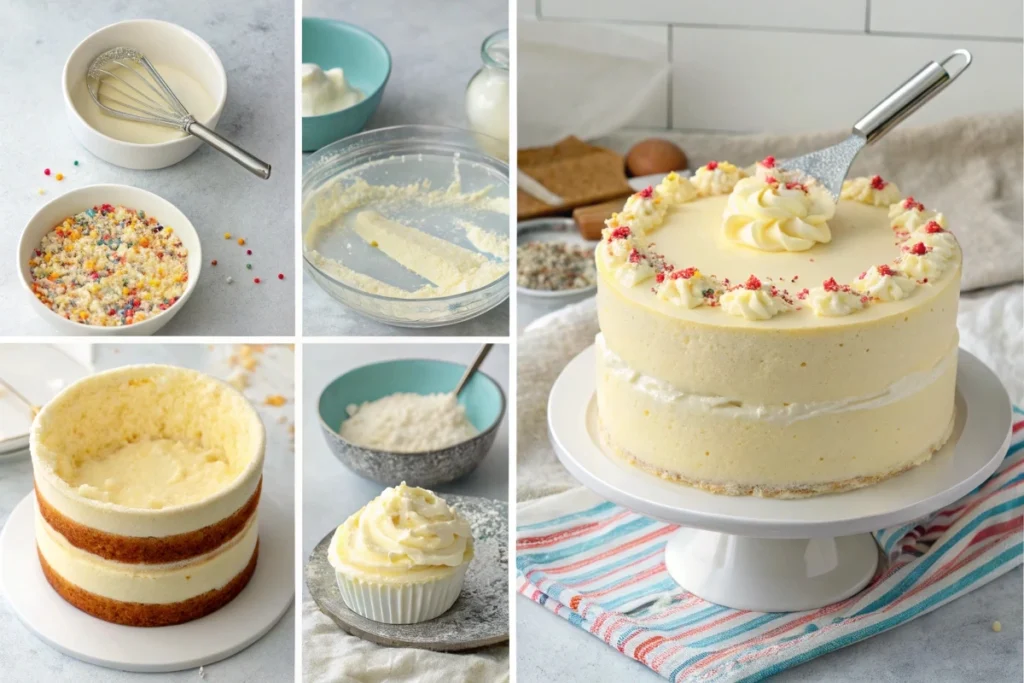
Now that you’ve gathered all your ingredients, it’s time to get baking! This dairy-free vanilla birthday cake is surprisingly simple to make, especially with our easy-to-follow steps. Whether you’re a seasoned baker or trying your hand at cake-making for the first time, this recipe is designed to be foolproof and fun. Let’s walk through each stage of preparation so you can confidently create a beautiful, flavorful cake that everyone will love.
Step 1: Preheat the Oven and Prepare the Pans
Start by preheating your oven to 350°F (175°C). While it heats up, prepare your cake pans. You can use two 9-inch round pans for a layered cake or a single 9×13-inch rectangular pan if you prefer a sheet-style birthday cake. Grease the pans thoroughly using a non-dairy butter or oil, then dust them lightly with flour to prevent sticking. Alternatively, you can line the bottom of the pans with parchment paper for extra insurance.
Pro Tip: If you’re making cupcakes, fill each liner about two-thirds full and adjust the baking time accordingly (usually around 18–20 minutes).
Step 2: Mix the Dry Ingredients
In a large mixing bowl, combine the dry ingredients: flour, sugar, baking powder, and salt. Use a whisk to mix them together until fully incorporated. This step ensures even distribution of the leavening agents and helps prevent lumps in your batter later on.
Pro Tip: Sifting the flour can help aerate it and lead to a lighter cake, but it’s not required if you’re short on time.
Step 3: Add the Wet Ingredients
Make a well in the center of the dry ingredients and pour in the wet ingredients: non-dairy milk, oil, vanilla extract, and eggs (or egg replacer). If you’re using a flax egg, make sure it has had a few minutes to gel before adding it in.
Using a spatula or electric mixer on medium speed, gently mix everything together until just combined. Be careful not to overmix—doing so can lead to a tough or dense cake. The batter should be smooth and slightly thick, with no visible streaks of flour.
Pro Tip: If your batter looks a bit lumpy at first, don’t worry! As long as there are no dry clumps, it will smooth out during baking.
Step 4: Pour the Batter into the Pans
Divide the batter evenly between your prepared Dairy-Free Vanilla Birthday Cake pans. If you’re making a layer cake, use a spatula or measuring cup to ensure each pan gets the same amount. Smooth the tops with a spatula so they bake evenly.
Pro Tip: Tap the pans gently on the counter a couple of times to release any air bubbles trapped in the batter. This helps the cake rise uniformly and reduces the chance of cracks forming on top.
Step 5: Bake the Cake
Place the pans in the preheated oven and bake for 28–32 minutes, or until a toothpick inserted into the center comes out clean. Avoid opening the oven door too early—letting in cold air can cause the cake to sink or crack.
Once done, remove the pans from the oven and let them cool on a wire rack for about 10–15 minutes. Then, carefully run a butter knife or offset spatula around the edges of the cakes to loosen them before flipping them out onto the cooling rack. Let them cool completely before frosting.
Pro Tip: If you’re making cupcakes, check for doneness after 18 minutes. Cupcakes bake faster than full-sized cakes.
Step 6: Frost and Decorate
Now comes the fun part—frosting and decorating your cake! Once the layers are completely cool, place one layer on a serving plate or cake board. Spread a generous layer of your favorite dairy-free frosting (we recommend vegan buttercream, coconut whipped cream, or cream cheese frosting), then top with the second layer. Apply a thin crumb coat to seal in any loose crumbs, followed by a final layer of frosting for a smooth finish.
Pro Tip: Chill the Dairy-Free Vanilla Birthday Cake for 15–20 minutes between applying the crumb coat and the final frosting for cleaner, sharper edges.
Step 7: Add Final Touches
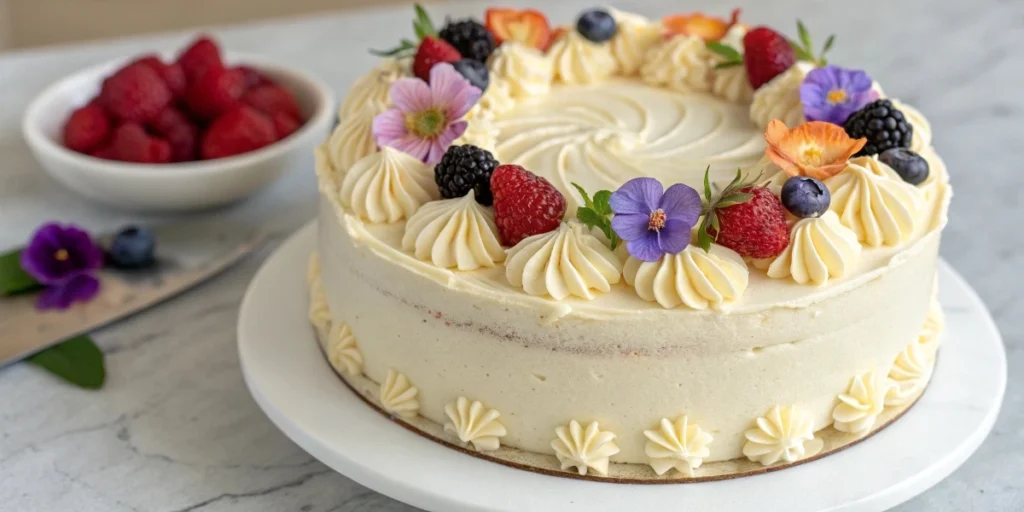
Top your Dairy-Free Vanilla Birthday Cake with fresh berries, sprinkles, edible flowers, or whatever decorations suit the occasion. You can even write a birthday message using piping bags or fondant letters for an extra-special touch.
Pro Tip: If you want a super creamy frosting, chill it in the fridge for 10–15 minutes before spreading to make it easier to work with.
And there you have it—a gorgeous, homemade dairy-free vanilla birthday cake that looks and tastes like it came straight from a bakery! Now, let’s move on to how to assemble and present your cake for maximum wow factor.
Assembling & Decorating YourDairy-Free Vanilla Birthday Cake
Once your cakes have cooled, it’s time for the fun part—assembly and decoration!
How to Assemble the Cake:
- Level the cakes – If needed, trim the tops for an even layer.
- Add frosting – Use a dairy-free vanilla buttercream or coconut whipped cream.
- Stack the layers – Place one cake on a plate, spread frosting on top, then place the second cake on top.
- Frost the outside – Smooth the frosting around the entire cake.
- Decorate! Add sprinkles, fruit, or edible flowers for a festive touch!
Pro Tip: Want a funfetti version? Add ¼ cup of rainbow sprinkles to the batter before baking.
Storage & Make-Ahead Tips
How to Store Dairy-Free Vanilla Cake
- Room Temperature: Store in an airtight container for up to 2 days.
- Refrigerator: Keep in the fridge for up to 5 days.
- Freezer: Wrap slices in plastic wrap and store for up to 3 months.
How to Keep It Fresh
- Reheat slices in the microwave for 10 seconds to make them soft again.
- Avoid refrigerating the cake for too long as it can dry out.
Recipe Variations & Fun Twists
Want to switch things up? Try these delicious variations!
Chocolate Dairy-Free Cake
- Replace ½ cup of flour with cocoa powder for a rich chocolate flavor.
Vegan Option
- Use flax eggs instead of regular eggs.
- Choose vegan frosting made with coconut cream.
Gluten-Free Option
- Use gluten-free all-purpose flour.
Conclusion: Try This Dairy-Free Vanilla Birthday Cake Today!
This dairy-free vanilla birthday cake is a game-changer! It’s soft, fluffy, and packed with vanilla flavor—without using any dairy. Whether you’re baking for a birthday, special occasion, or just because, this cake is a guaranteed crowd-pleaser.
So why not give it a try? 🎂 Bake, decorate, and enjoy!
FAQs: Dairy-Free Vanilla Birthday Cake
Can I make this cake without eggs?
Yes! Use flax eggs (1 tbsp flaxseed + 3 tbsp water per egg) for a vegan version.
What’s the best dairy-free frosting?
Try dairy-free vanilla buttercream (made with vegan butter) or coconut whipped cream.
Can I use coconut oil instead of vegetable oil?
Yes! Melted coconut oil works great, but it adds a slight coconut flavor.
How do I make sure my cake is moist?
- Don’t overmix the batter.
- Use enough oil and dairy-free milk.
- Don’t overbake! Check with a toothpick at 30 minutes.
Can I make cupcakes with this recipe?
Yes! Bake for 18–20 minutes at 350°F (175°C) instead of 30–35 minutes.
If you’re looking to infuse your home with authentic Moroccan charm, be sure to visit ARTISANAT MARRAKECH MAROC .
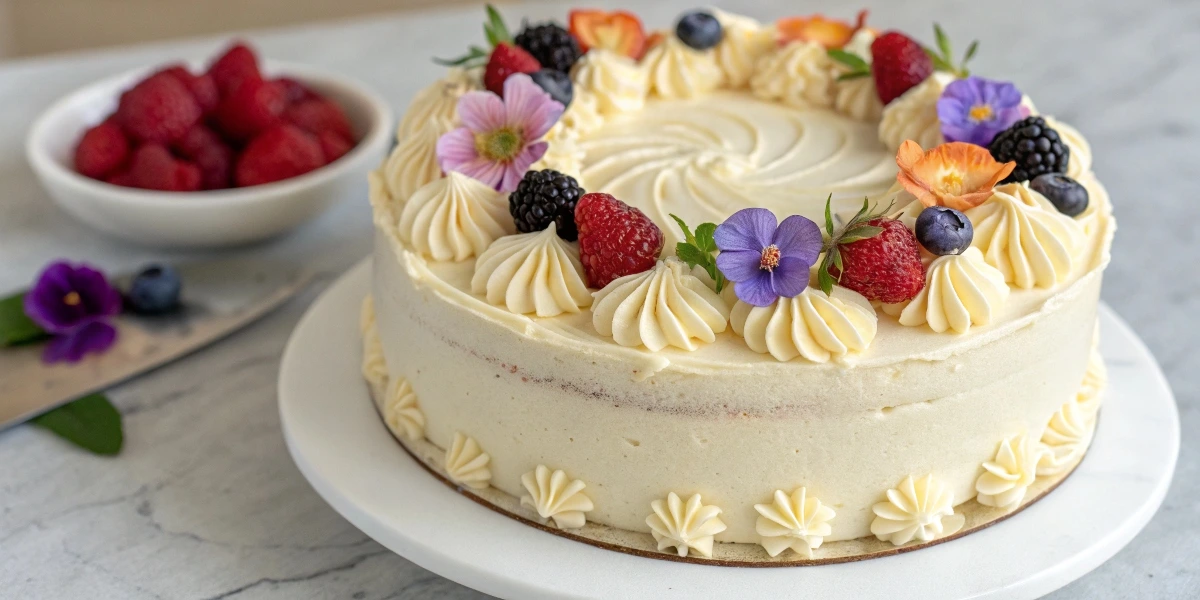
Dairy-free vanilla birthday cake
Ingredients
Notes
🧁 Step-by-Step Instructions: How to Make This Easy Cake
This dairy-free vanilla birthday cake is super simple to make—no mixer required! Just one bowl and about 45 minutes of your time. Let’s get started!Step 1: Preheat the Oven
Preheat your oven to 350°F (175°C) . Grease two 9-inch round cake pans (or one 9×13-inch pan) with a little non-dairy oil or butter, then dust lightly with flour. Alternatively, line the bottom with parchment paper.Step 2: Mix the Dry Ingredients
In a large mixing bowl, whisk together:- Flour
- Sugar
- Baking powder
- Salt
Step 3: Prepare the Wet Ingredients
In a separate small bowl or measuring cup, mix:- Non-dairy milk
- Oil
- Vanilla extract
Add the flax eggs and stir until fully blended.
Step 4: Combine Wet and Dry
Pour the wet ingredients into the dry ingredients. Stir gently with a spatula or wooden spoon until just combined. Be careful not to overmix—it’s okay if there are a few small lumps.Step 5: Pour Into Pans
Divide the batter evenly between your prepared pans. Use a spatula to smooth the tops.Step 6: Bake the Cake
Place the pans in the preheated oven and bake for 28–32 minutes , or until a toothpick inserted in the center comes out clean.Step 7: Frost and Decorate
Once the layers are cool, place one layer on a serving plate. Spread a generous amount of your favorite dairy-free frosting on top. Add the second layer and frost the top and sides.- Apply a thin crumb coat first and chill for 15 minutes.
- Then apply a final, thicker layer of frosting and smooth it out with a spatula or bench scraper.
