
Have you ever wondered if you could turn everyday ingredients into dreamy, creamy ice cream with almost no effort?
Well, you’re about to find out! Thanks to the magic of ninja creami recipes, making homemade frozen treats is easier (and more fun!) than ever. With just a few simple ingredients and a push of a button, you can whip up your favorite desserts — from rich ice cream to refreshing sorbets — right in your own kitchen. Curious? Let’s dive in and discover the sweet secrets inside.
Table of Contents
What Makes Ninja Creami Recipes So Special?
The Ninja Creami machine is a true kitchen superhero. Why? Because it can take plain ingredients and turn them into delicious, creamy treats in just minutes!
Here’s what makes ninja creami recipes different and amazing:
- Quick and Easy: Most recipes take less than 10 minutes of hands-on work!
- No Fancy Skills Needed: You don’t need to be a chef — if you can press a button, you can make magic.
- Super Versatile: Make ice cream, sorbet, smoothie bowls, gelato, milkshakes, and even healthier treats like protein ice cream.
- Customizable: You can control what goes into your treat — less sugar, more fruit, dairy-free — whatever you like!
Time Requirements:
- Preparation time: 5–10 minutes
- Freeze time: 24 hours (the base must be frozen before spinning)
Difficulty Level:
- Beginner-friendly. Perfect for kids, teens, and adults!
Essential Ingredients for Ninja Creami Recipes
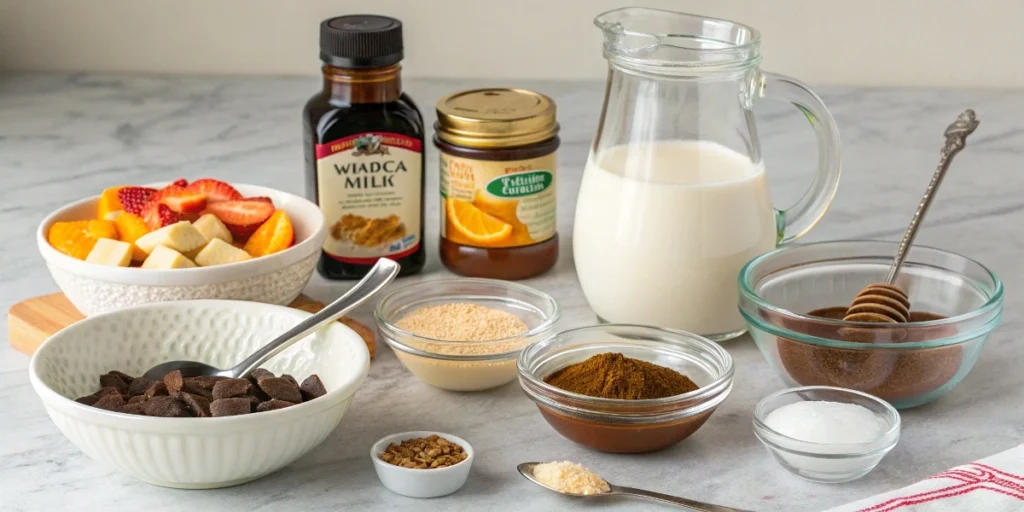
When it comes to ninja creami recipes, you really don’t need much. Here are the main ingredients you’ll use most often:
Common Essentials:
- Milk or Cream: Helps make your treats super creamy.
- Sweetener: Sugar, honey, maple syrup, or a sugar substitute.
- Flavor Boosters: Vanilla extract, cocoa powder, fruit, or nut butter.
- Salt: Just a pinch to make the flavors pop!
Popular Alternatives:
| Original Ingredient | Alternative | Difference |
|---|---|---|
| Heavy cream | Coconut milk | Adds a tropical flavor, dairy-free. |
| Sugar | Stevia or monk fruit | Lower in calories. |
| Milk | Almond or oat milk | Great for vegans! |
| Chocolate syrup | Cocoa powder | Less sweet, richer taste. |
Why These Ingredients Matter:
- Fat (like cream or coconut milk) makes the texture smooth and rich.
- Sugar helps the ice cream stay soft and scoopable.
- Flavoring brings your creation to life!
Step-By-Step Instructions for the Best Ninja Creami Recipes
Making treats with the Ninja Creami is super fun — and super easy once you know the steps! Whether you want creamy ice cream, a fruity sorbet, or a healthy smoothie bowl, the process is almost the same. Let’s break it down slowly so you can get perfect results every time.
Step 1: Pick Your Recipe
First, decide what kind of treat you want to make.
Here are some easy ideas to start with:
- Classic Vanilla Ice Cream
- Chocolate Fudge Ice Cream
- Mango Sorbet
- Protein Smoothie Bowl
- Low-Sugar Strawberry Yogurt Ice Cream
Each recipe uses a base, which is just a mix of simple ingredients like milk, cream, and sugar.
Tip: If you’re feeling creative, you can even make up your own recipes!
Step 2: Mix the Base
Once you know what you want to make, it’s time to mix your ingredients together.
For a simple vanilla ice cream base, you need:
- 1 cup whole milk
- 1 cup heavy cream
- ½ cup sugar
- 1 teaspoon vanilla extract
- A small pinch of salt
How to mix:
- Get a medium-sized bowl.
- Pour in the milk and cream.
- Add the sugar, vanilla, and salt.
- Stir, stir, stir until the sugar is completely dissolved.
(You can use a whisk or just a big spoon!)
Helpful Tip: If you want extra-smooth ice cream, use a hand blender or whisk really well so everything blends perfectly.
Step 3: Pour Into the Pint Container
After your base is fully mixed, carefully pour it into the Ninja Creami pint container.
Important Tips:
- Only fill up to the MAX FILL line. Don’t go over it!
- Make sure the mixture is even and flat — not lumpy or uneven.
- Wipe off any spills on the outside of the container.
Pro Tip: A flat base helps the machine spin everything evenly later!
Step 4: Freeze Completely
Now, patience!
Put the pint container into your freezer. Freeze it for at least 24 hours.
This step is super important — the base needs to be completely solid for the Ninja Creami to work its magic.
Best Freezing Tips:
- Freeze your pint on a flat surface.
- Keep the lid on tight so no freezer smells sneak in.
- Don’t rush! If it’s not fully frozen, your ice cream might turn out weird.
Extra Tip: Want to have ice cream faster next time? Prep 2-3 pints at once and leave them in the freezer. Then you’ll always have some ready!
Step 5: Spin It in the Ninja Creami
When you’re ready to eat your treat, it’s time for the fun part — spinning!
How to Spin:
- Remove the lid from your frozen pint.
- Place the pint into the outer bowl of the Ninja Creami.
- Attach the outer bowl lid tightly.
- Lock the bowl into the machine.
- Choose your setting! (Like “Ice Cream,” “Sorbet,” “Gelato,” or “Smoothie Bowl.”)
- Press START and watch the magic happen!
Helpful Hints:
- Each setting is made for a special type of treat. (Don’t use “Sorbet” for an ice cream base!)
- The machine is a little noisy while spinning — that’s normal.
- It usually takes just 2–3 minutes to spin.
Step 6: Check the Texture
After the first spin, open the lid and take a look.
- Is it creamy and scoopable? Yay, you’re ready to eat!
- Is it crumbly or dry? No problem! Here’s what to do:
Fixing Crumbly Ice Cream:
- Add a tablespoon of milk, cream, or your dairy-free milk into the pint.
- Reattach everything.
- Spin again on the “Re-spin” setting.
Most of the time, one extra spin makes it perfect!
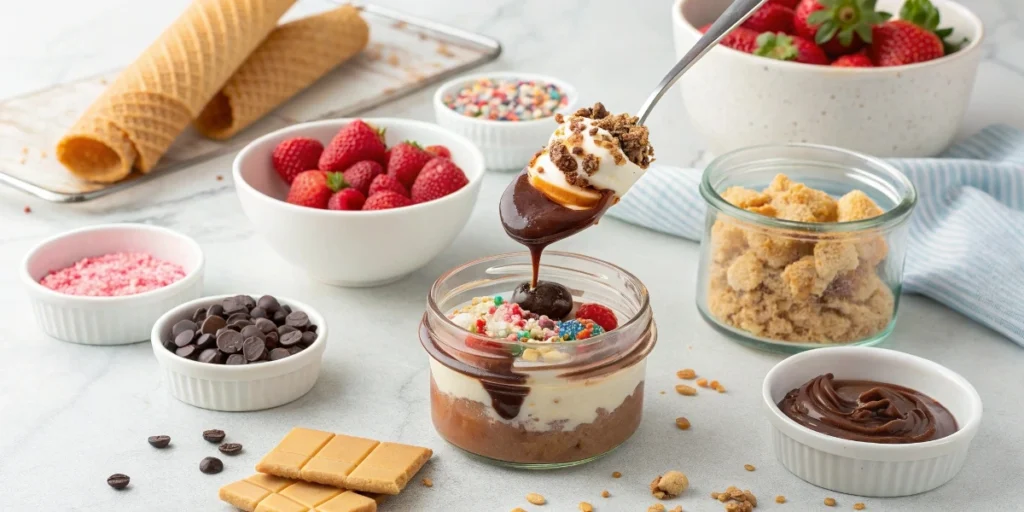
Step 7: Add Mix-Ins (If You Want!)
This part is super fun! After the first spin, you can add yummy extras like:
- Chocolate chips
- Cookie crumbles
- Fresh berries
- Nuts
- Swirls of peanut butter or caramel
How to Add Mix-Ins:
- Make a small hole in the middle of your pint.
- Drop your mix-ins into the hole.
- Put the pint back into the machine.
- Use the “Mix-In” button to blend everything perfectly.
Cool Ideas:
Try adding chopped-up Oreos for a cookies-and-cream flavor, or a swirl of Nutella for a chocolate surprise!
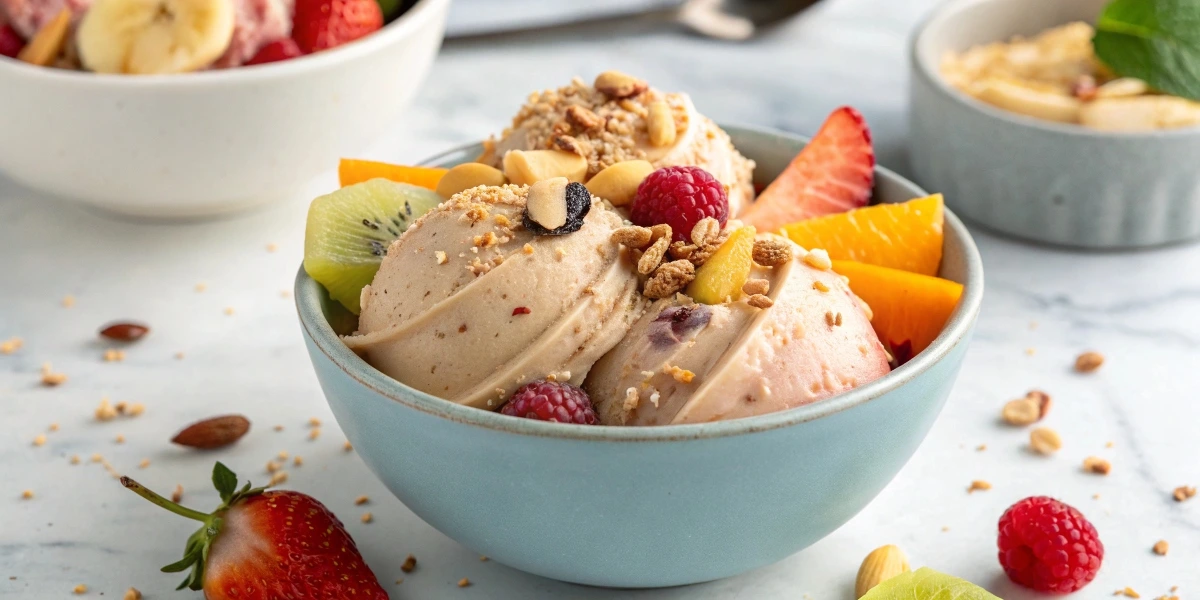
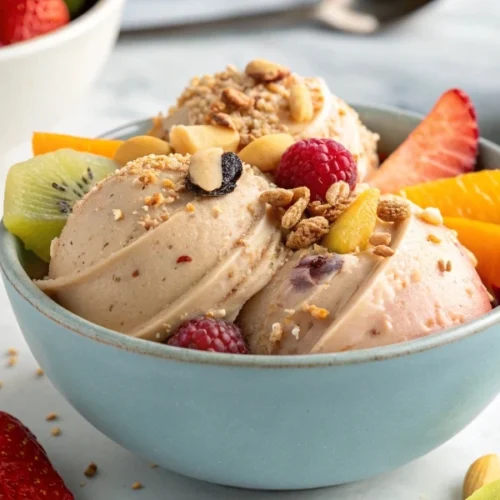
Step 8: Scoop and Serve
Now your treat is ready to enjoy!
Scoop Tips:
- Warm your scoop under hot water for smooth, easy scooping.
- Serve your ice cream in cones, bowls, or even layered in a jar with toppings.
- Don’t forget to take a picture — it’ll look as good as it tastes!
Presentation Ideas:
- Add a drizzle of chocolate syrup.
- Sprinkle on rainbow sprinkles.
- Top with a dollop of whipped cream and a cherry
Storage and Make-Ahead Tips
Keeping your Ninja Creami recipes fresh is super easy:
- Store leftovers: Smooth the top of the ice cream, re-freeze, and spin again when you’re ready to eat.
- Make-Ahead: Prepare several pints at once! Stock your freezer for treats all week long.
- Re-spin if needed: If your ice cream gets hard, just add a spoonful of milk and re-spin.
Storage Time:
- Best within 2 weeks for the freshest flavor!
Fun and Creative Ninja Creami Recipe Variations
Why stop at vanilla? Here are some fun ideas to try:
Fruity Fun:
- Strawberry Banana Ice Cream: Blend fresh strawberries and a ripe banana with cream.
- Mango Sorbet: Puree mango chunks and a little sugar for a tropical dream.
Chocolate Lovers’ Paradise:
- Double Chocolate: Add cocoa powder and mini chocolate chips.
- Chocolate Peanut Butter: Mix in a swirl of peanut butter.
Healthy Choices:
- Protein Ice Cream: Add a scoop of your favorite protein powder to the base.
- Low-Sugar Berry Bowl: Blend fresh berries with Greek yogurt and a touch of honey.
Dairy-Free Delights:
- Coconut Milk Gelato: Use full-fat coconut milk instead of cream.
- Almond Butter Banana Bowl: Almond milk and nut butter make a great base!
Conclusion: Time to Make Some Ninja Creami Magic!
There you have it — the amazing world of ninja creami recipes! Whether you want a rich chocolate treat, a fruity sorbet, or a protein-packed snack, the Ninja Creami has your back.
It’s quick, it’s fun, and best of all, it lets you create exactly what YOU crave, with ingredients you trust.
So why not grab your favorite ingredients, freeze up a pint, and spin some magic today? Your taste buds will thank you!
FAQs About Ninja Creami Recipes
1. Can I make Ninja Creami recipes without dairy?
Absolutely! Use almond milk, coconut milk, or oat milk. They work great and taste amazing.
2. How healthy are Ninja Creami recipes?
You control the ingredients! You can make low-sugar, high-protein, or even keto-friendly recipes. Healthier than store-bought ice creams with weird ingredients!
3. How long does it take to make ice cream with the Ninja Creami?
Prep takes just 5–10 minutes. But the base must freeze for 24 hours before you spin it.
4. Can I add mix-ins like chocolate chips or nuts?
Yes! After your first spin, add mix-ins and use the “Mix-In” button on your machine. So fun and delicious!
5. My ice cream turned out crumbly. What did I do wrong?
No worries! Just add a tablespoon of milk or cream to the pint and spin again. It’ll come out perfectly creamy!
6. Can I make more than just ice cream?
Yes! The Ninja Creami makes smoothies, milkshakes, sorbet, gelato, and even slushy drinks.
ninja creami recipes
Ingredients
- 🍦 Ingredients for Ninja Creami Ice Cream
- ✅ Base Ingredients:
- 1 cup whole milk or almond milk for lighter option
- 1/2 cup heavy cream makes it extra creamy!
- 1/4 cup white sugar or honey for natural sweetness
- 1 teaspoon vanilla extract
- Optional: pinch of salt brings out the flavor
- ✅ Optional Mix-ins:
- Chocolate chips
- Crushed cookies
- Fresh strawberries
- Peanut butter swirls
Notes
Step-by-Step Instructions for Ninja Creami Recipes
Step 1: Mix the Base- In a bowl, stir together milk, cream, sugar, vanilla, and a tiny pinch of salt.
- Mix until the sugar completely dissolves.
- Pour the mixture into your Ninja Creami pint container.
- Close the lid and freeze it completely flat for at least 24 hours.
- After 24 hours, take the pint out of the freezer.
- Place it in the Ninja Creami machine.
- Select the “Ice Cream” setting and let it spin.
- If it looks powdery, no worries!
- Just add a splash (1–2 tablespoons) of milk and respin.
- Want extra fun? Use the “Mix-In” setting to add your chocolate chips, cookie chunks, or fruit pieces.
- Scoop your creamy treat into a bowl.
- Top with sprinkles, syrup, or extra goodies if you like!